 Loading... Please wait...
Trunk Latch Micro Switch Replacement
This DIY was completed ENTIRELY by the hardest
working VW Vortex moderator on the site!! Gary Thompson, Ph.D. - vortex ID VGRT6, email
address vgrt6@yahoo.com. Please make sure to say thanks to Gary, and if you ever see him at
a bar, buy em a beer. These DIY's are more complete than anything Bentley has ever written!!
STEPS FOR REPLACING MKIV JETTA TRUNK LATCH MICROSWITCH
The following outlines the procedure for replacing the trunk microswitch on a MKIV Jetta (and
possibly a Golf/GTI as well). These microswitches commonly fail, causing the trunk light to operate
intermittently or not at all. Also, it causes the trunk open light on the instrument cluster to not work.
The procedure was based on a 99.5 Jetta GLS VR6 - it may be slightly different on later-models
cars (which have the emergeny release inside the trunk).
1. Open trunk lid and remove the carpet lining. There are 13 Phillips head screws which are
located approximately where the yellow circles are in the following picture.
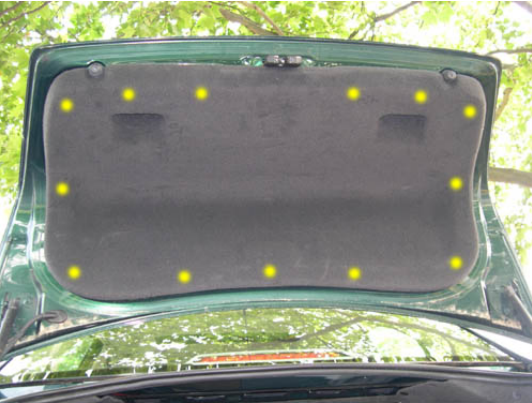
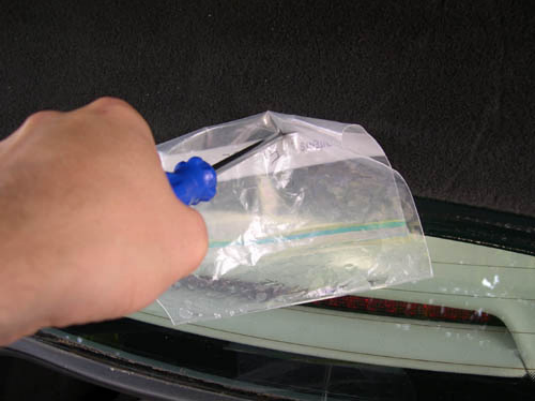
2. The screws in the above picture are coated with carpet fibers, so using a bare screwdriver may
scratch the coating off. I used a ZipLoc Freezer bag folded in half to prevent this from happening,
as shown below. It did a pretty good job of keeping the screw coating intact.
3. Once the carpet lining is off, disconnect the actuator rod from the latch assembly by unsnapping
the rod connector (yellow arrow in picture below) and removing the rod from the connector.
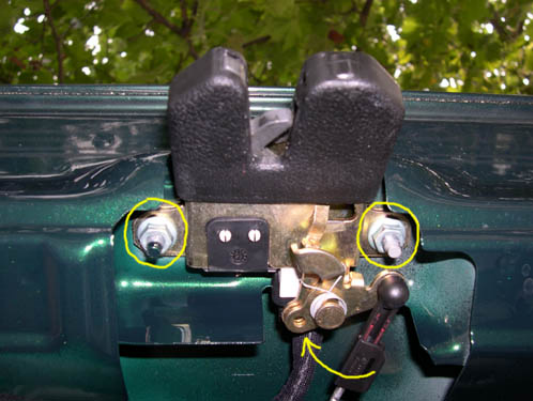
4. Remove (2) 10mm nuts (inside yellow circles in above picture) to disconnect the latch assembly
from the trunk lid.
5. Flip up microswitch retaining flap on underside of trunk latch assembly (yellow arrow in picture
below).
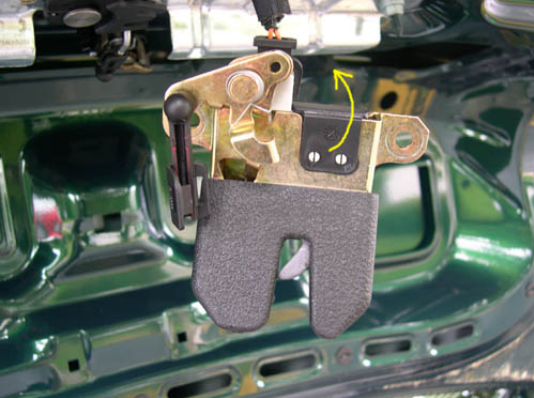
6. After doing so the microswitch should slide right out of the latch assembly, as seen in the picture
below. Disconnect the microswitch from its harness connector by pulling the two side tabs outward
(yellow arrows) at the same time.
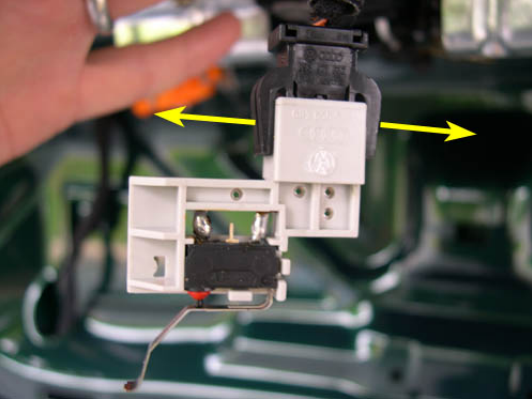
7. You can test to see if the microswitch is bad and causing the trunk light/dash indicator not to
work by jumping the two terminals in the harness connector with a small wire. If the trunk light
comes on, then the microswitch is bad and needs to be replaced. If the light doesn't come on, then
the problem may also be somewhere else (but may be the microswitch as well). Check the bulb
(you should really do this first) and the wiring between the harness connector and the light.
8. Install new microswitch and reassemble everything by following the above in reverse.
The microswitch is VW part# 8D5959489 (supposedly there is also a trunk microswitch with part#
8D5959489B which may be used on later-model cars - double check your part#s before ordering).
The cheapest I could find it for was $10.95 at Auburn VW (1stVWParts or 1-888-528-5280).
In case someone needs to replace the entire latch assembly, the VW part# is 1J5827505D01C.
The cheapest price I've seen it for is $44.76 at 1stVWParts. I'm not sure if the latch assembly
comes with the micro, but based on the image below that I found on IMPEX's website, it looks like
the latch may come with a micro.
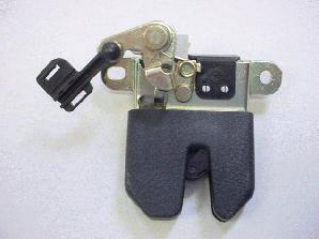
The lock assembly for a GTI/Golf is different. The part number is 1J6827505BB41
Most Popular
-
1
-
2
-
3
-
4
-
5


